Photos
Parents love seeing photos of their kids in the classroom! MC makes it easy to share classroom activity with the entire school, individual classrooms, or just the parents of an individual student. Photos are always as private as you would like them to be.
- Administrative users have the ability to view/edit all existing photo albums and create new albums.
- Teacher users have the ability to view/edit photo albums that are shared with a group of which they are a part (ALL SCHOOL or a Classroom to which they are assigned) or those that are shared with them specifically (as an Editor of the album). Teachers can also create new albums.
- Parent/Guardian users can only view albums that are shared with them.
There are 2 types of albums in Photos: Custom Albums and Activity Albums. Activity Albums are created automatically when photos are uploaded via the Quick Add feature. For each student, a Private album and a Shared album will be created as photos are uploaded through Quick Add with the corresponding sharing selection made (e.g. if box to “Share with Parents” is checked, the Shared album will be created, if not checked, the Private album will be created). Once each student’s Activity Albums are created, all future photo uploads via Quick Add will be stored in the appropriate album. There will also be a Private and a Shared Activity Album created for the classroom as a whole where photos without a selected student will be saved. The Shared Activity Albums for individual students will automatically be shared with any/all Parent/Guardians attached to the Student’s Profile, as well as any Teachers assigned to the child's classroom. The Shared Classroom Activity Album will automatically be shared with all parents attached to all the students enrolled in that classroom. The Private Activity Albums will be visible to any Teacher of a classroom to which the student is assigned, as well as all Administrators.

You can also create Custom Albums, ideal for special events and activities, and share them with specific groups or individuals. Go to <Photos>. Click the Create Album button to create a new album. Give your new album a name and optional description. You may then upload your photos to the new album. Remember to share the album with the desired Viewers. To share with an individual child's family, you will need to select each parent's name in the Album Viewers (Users) field. To share with the group, you can either select "All School" or a classroom name in the Album Viewers (Classroom) field.

Editing Photo Albums and Uploading Photos
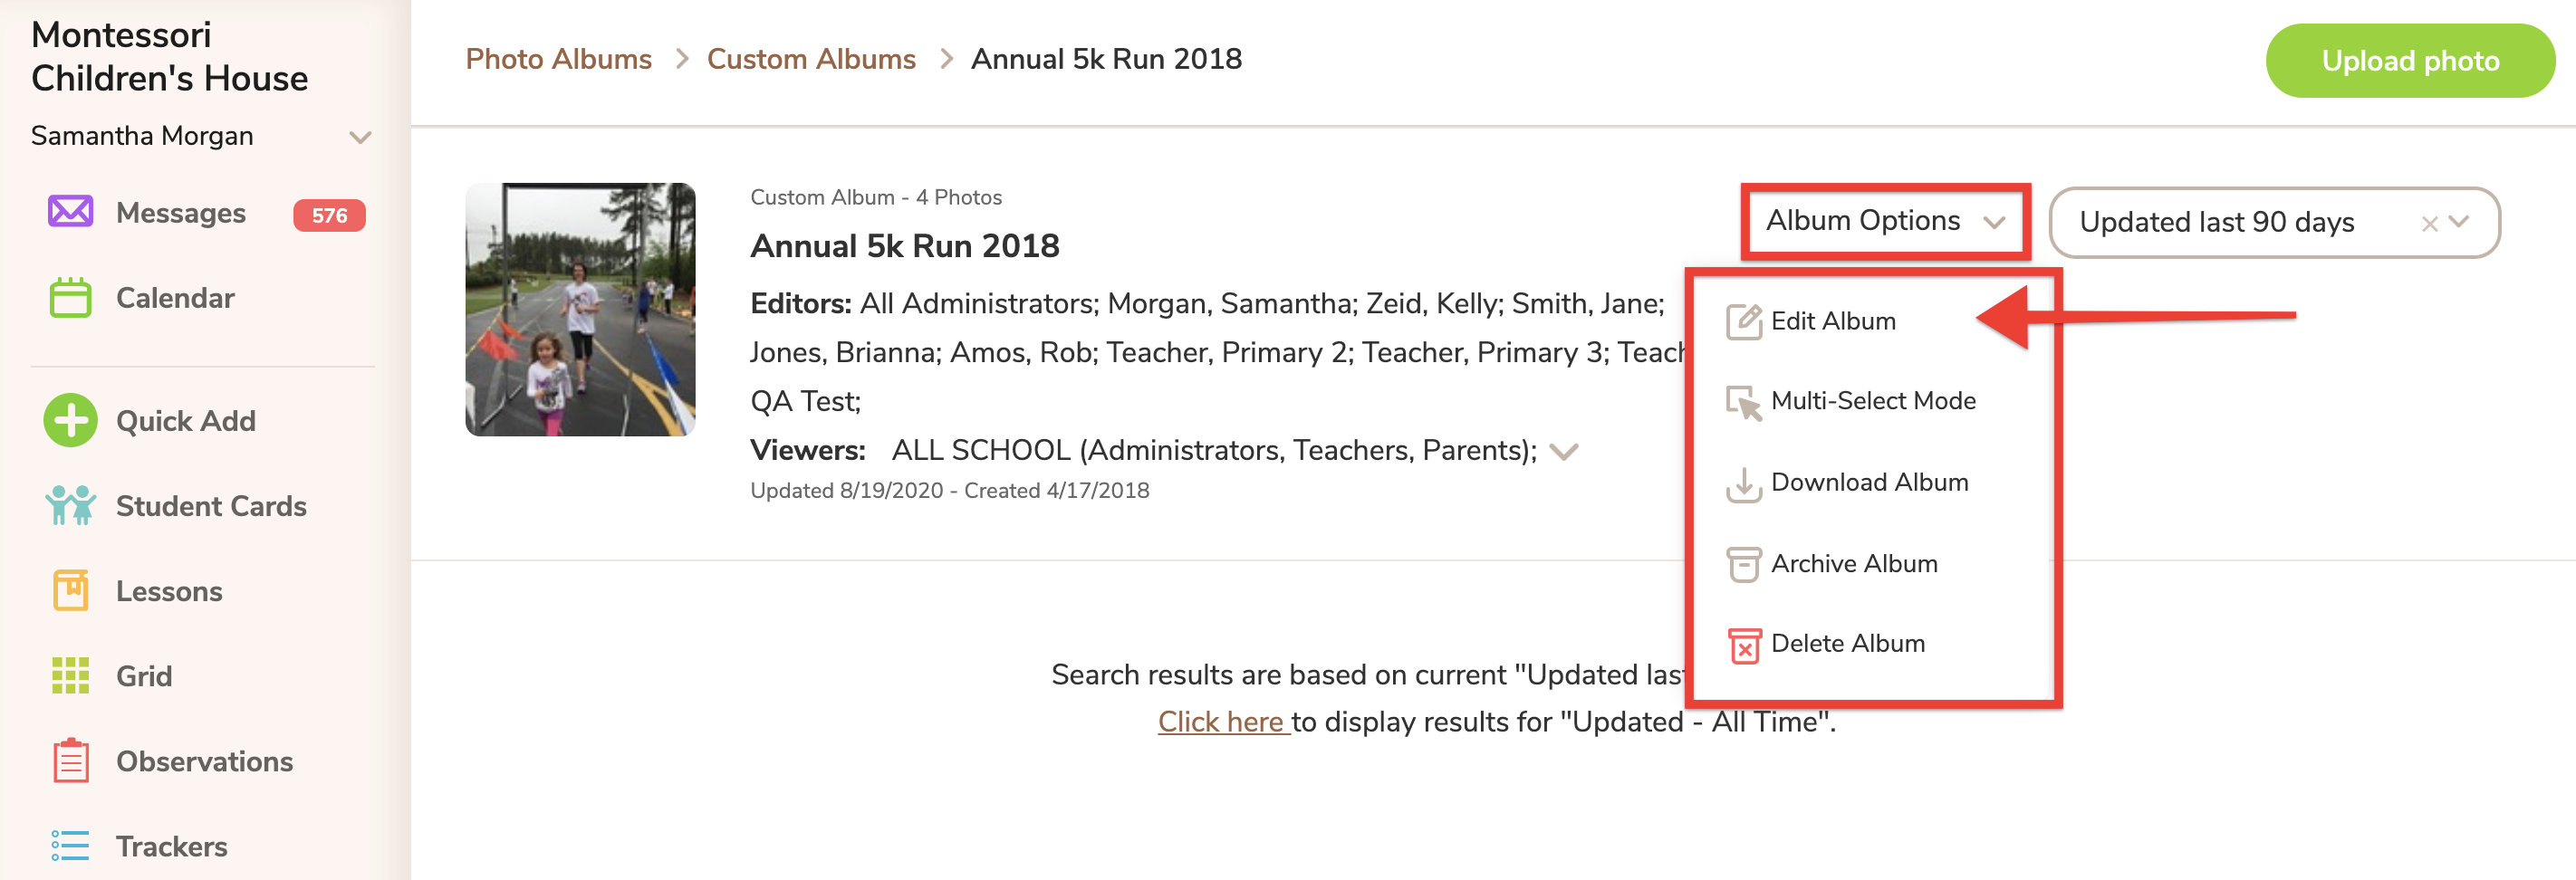
Editing Photos, Changing Album Cover, Adding Photos to other Albums
To edit individual photos, click "Edit Photo" on the thumbnail image. You can edit the name of the photo and add a caption. You can also add the photo to multiple albums. No need to upload the photo twice. Simply type the name of another album in the Albums field and you can add the same photo to as many albums as you would like. Click the checkbox at the top to use this photo for the album cover.

To edit or move/duplicate multiple photos at the same time, click the "Album Options" menu and choose "Multi-Select Mode" from the listed options.


Archiving Photo Albums
Because we know how much everyone loves photos, we realize that over time, your album organization can begin to get a bit unruly. In order to help each user better organize this valuable feature in MC, you can either archive or delete old photo albums. Simply open the album and then click the "Album Options" menu. Select "Archive Album" and the album will be removed from active status on your profile only, but can be restored at a later time. Archived albums still maintain full functionality, meaning you may still view and upload new photos to these albums. Anyone else with whom the album is shared will be able to view any new photos you upload as well. For example, if a teacher uploads a new photo to an album that a parent has archived, the photo album will be automatically unarchived on the parent's profile and display on the active photo albums page again. This is to prevent anyone from missing information you want to share. The parent can re-archive the album once they have viewed the new photo. You may click the "Restore this album" link to restore it to active status on your own profile.
Please note: The archive feature is merely an organizational tool for you. It will not impact the display of this album for any other user. However, deleting the album will permanently delete it (after the 90-day hold period) school-wide.


