Make Custom Lists of Lessons with Lesson Labels
Have you ever wished you could create a custom group of lessons to help you focus on smaller chunks of the curriculum? Now you can! Lesson Labels can be used to customize sets of lessons from various Curriculum Categories. For example, maybe you want to have a list of JUST the essential lessons you want to be sure all your first-year students receive, or those you want all your third-year students to accomplish before moving to the next level. Maybe you want to create a set of lessons you always present in September, or all the lessons to be presented in a special unit you are exploring. You can now create custom groupings and view those lessons together on the same page of the Grid.
Here’s how it works:
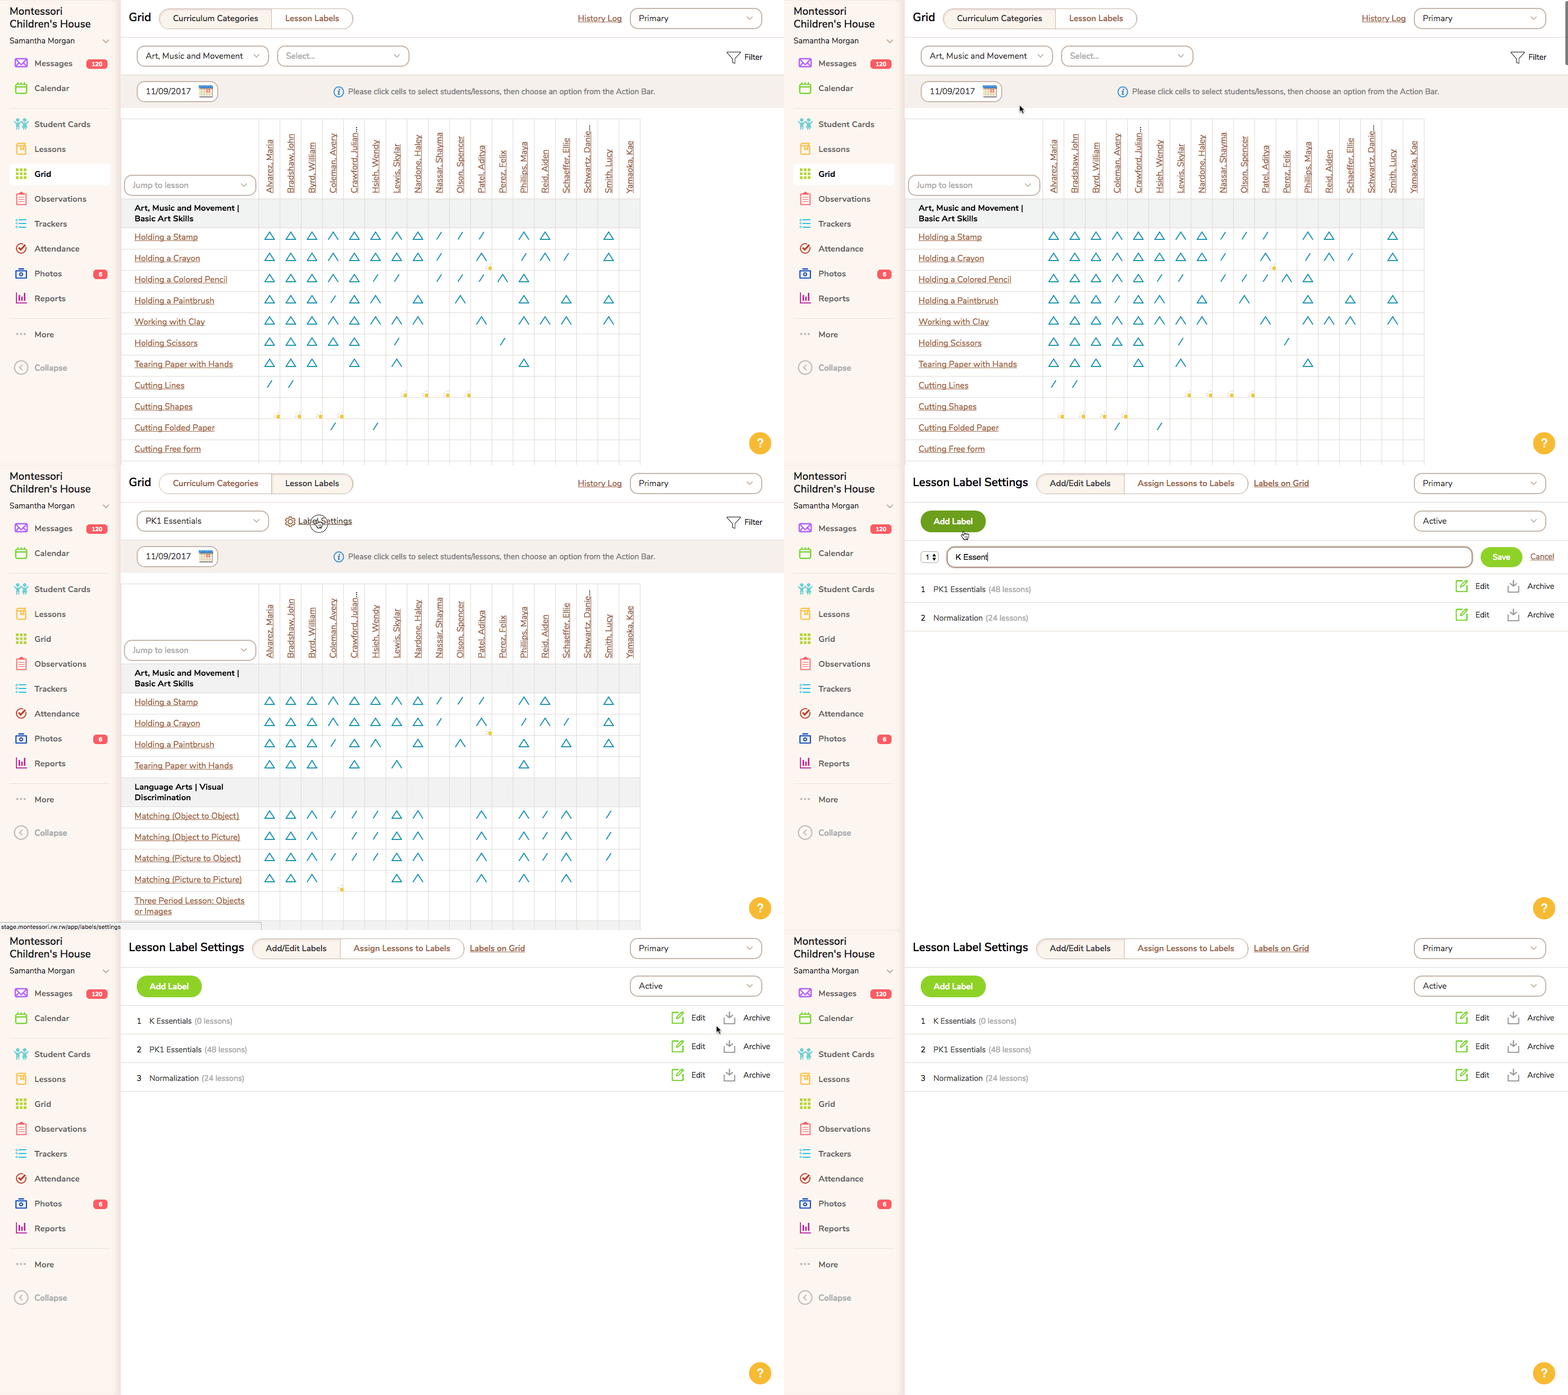
Go to <Grid> and next to the page heading you will see 2 viewing options, Curriculum Categories and Lesson Labels. Select Lesson Labels and then click “Label Settings.” Here, you’ll be able to create new Lesson Labels for your classroom and assign or remove lessons from each label you’ve created.
1. Create a new Lesson Label
Click the green “Add Label” button and enter the name of the group of lessons you want to create. Remember to click the “Save” button.

2. Assign lessons to a Lesson Label
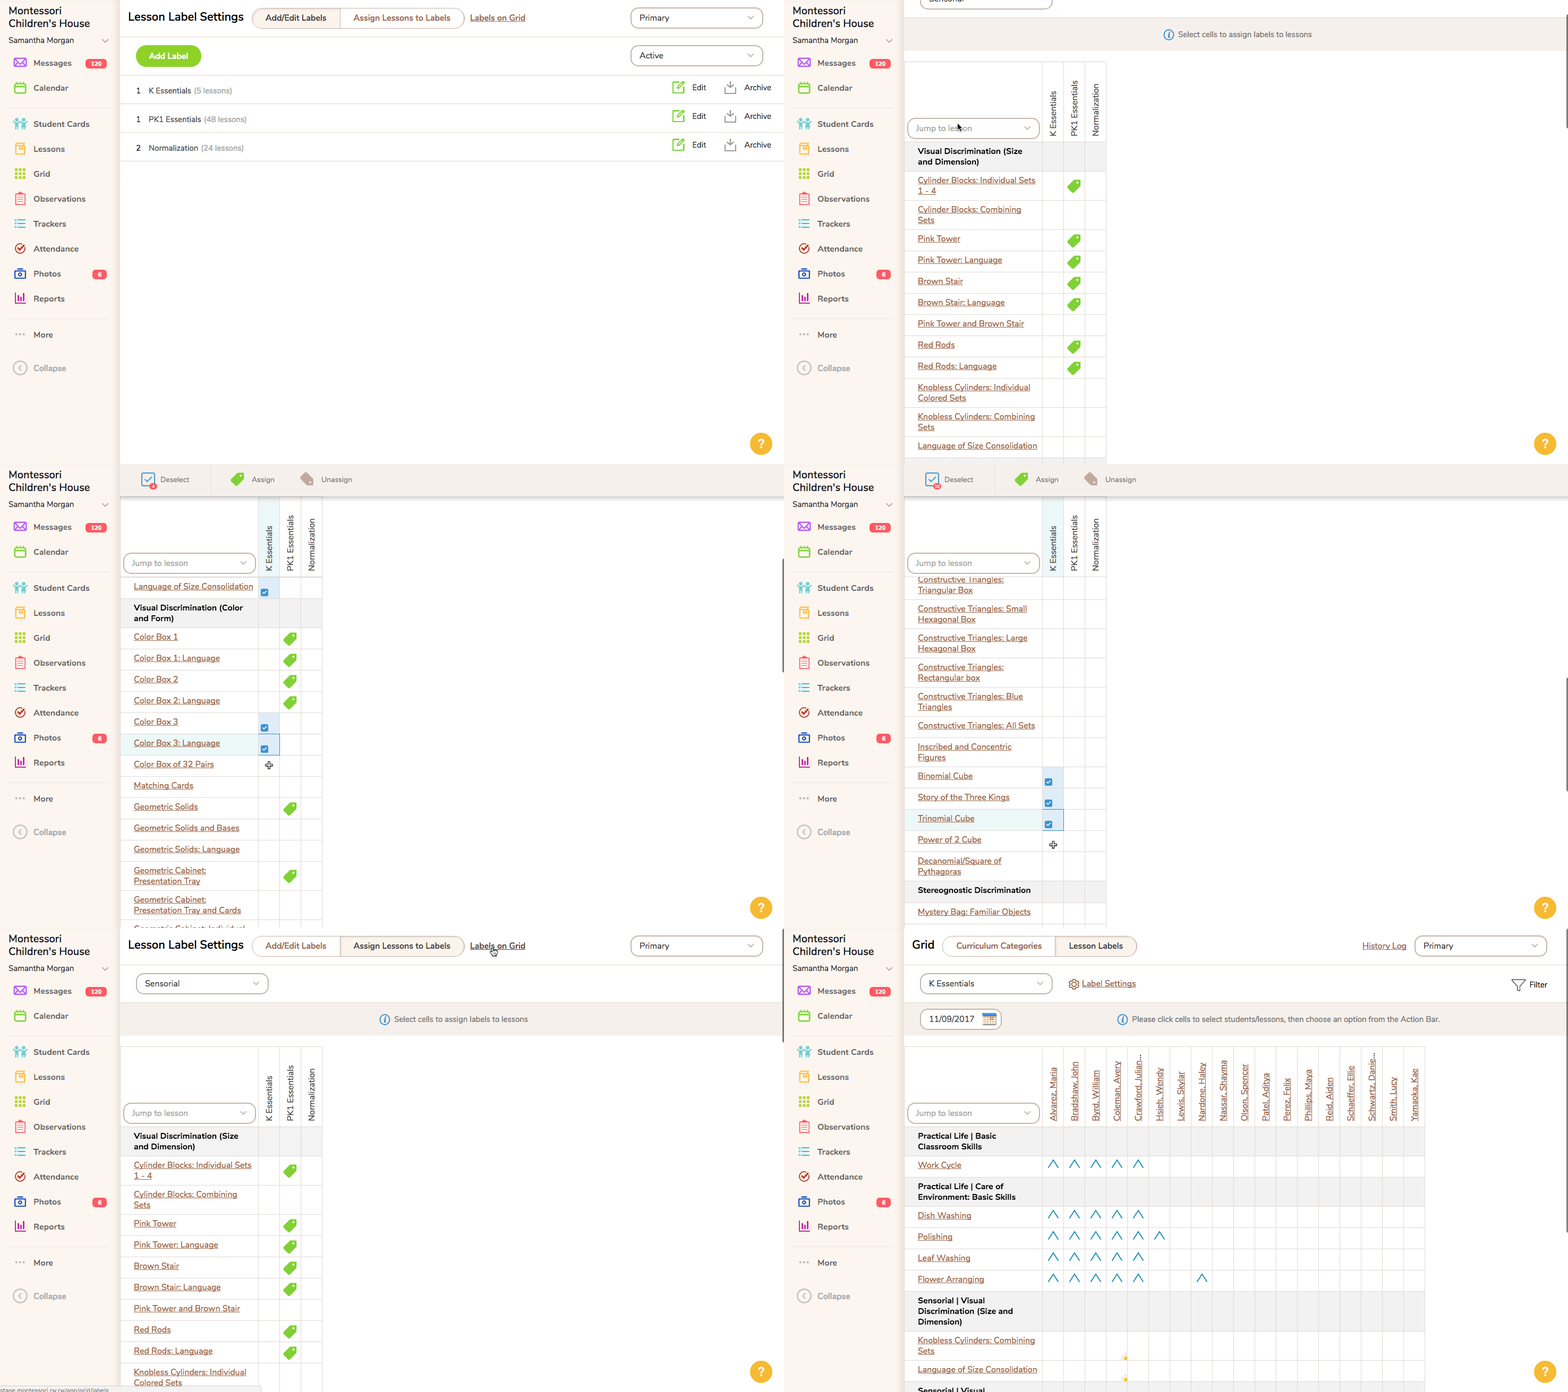
At the top of the page, next to the heading “Lesson Label Settings” you will see another double-sided button. Click the right side that says “Assign Lessons to Labels.” Select the category from which you want to assign lessons and then simply click in the boxes next to the desired lessons under the column for your new Lesson Label. Once you’ve selected the lessons you want, click “Assign” in the action bar at the top, represented by a green tag icon. If you want to remove a lesson from a label, just select the box next to the lesson again and click “Unassign” in the action bar at the top, represented by a gray tag icon.

3. Record on the Grid by Lesson Label
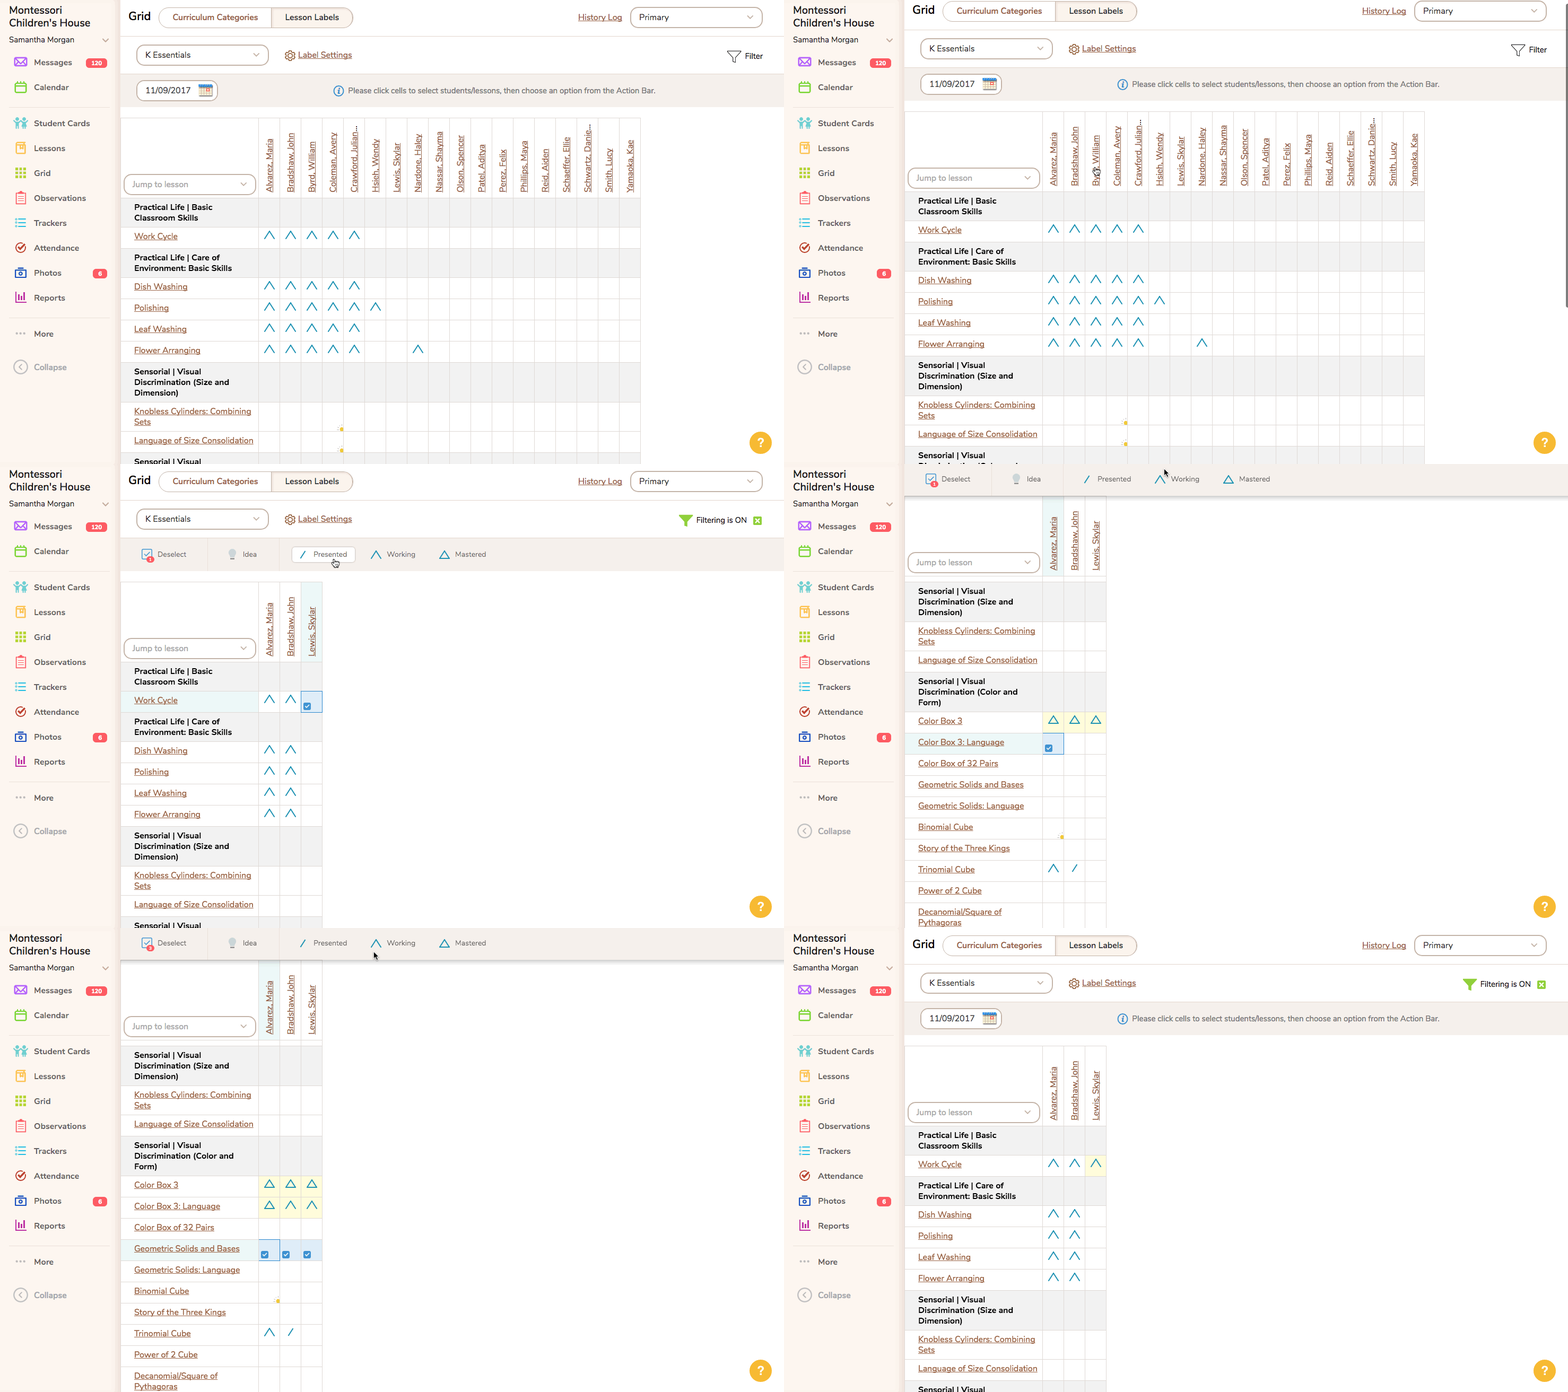
To view and record lessons in your new Lesson Label on the Grid, from the page where you’ve just added lessons to that label you’ll click the “Labels on Grid” link at the top to the right of the double-sided button. Then select the Lesson Label you want to view from the dropdown menu in the upper left (just as you would choose the Curriculum Category). In the future, to access that Lesson Label on the Grid, just click on <Grid> from the left-side navigation panel and then the “Lesson Labels” side of the double-sided button at the top. Now you can mark Lesson Ideas or record lessons as usual.

We recognize that some may wish to copy a Lesson Label from one classroom to another. That is not available at this time. However, we are working on a solution for this in the future.
