Add a Profile Photo to a Student Profile
To add a profile photo to your students' profiles, you will need to have the ability to edit the student profiles. Currently, only Administrators have this ability. Once you're logged in as an Administrator:
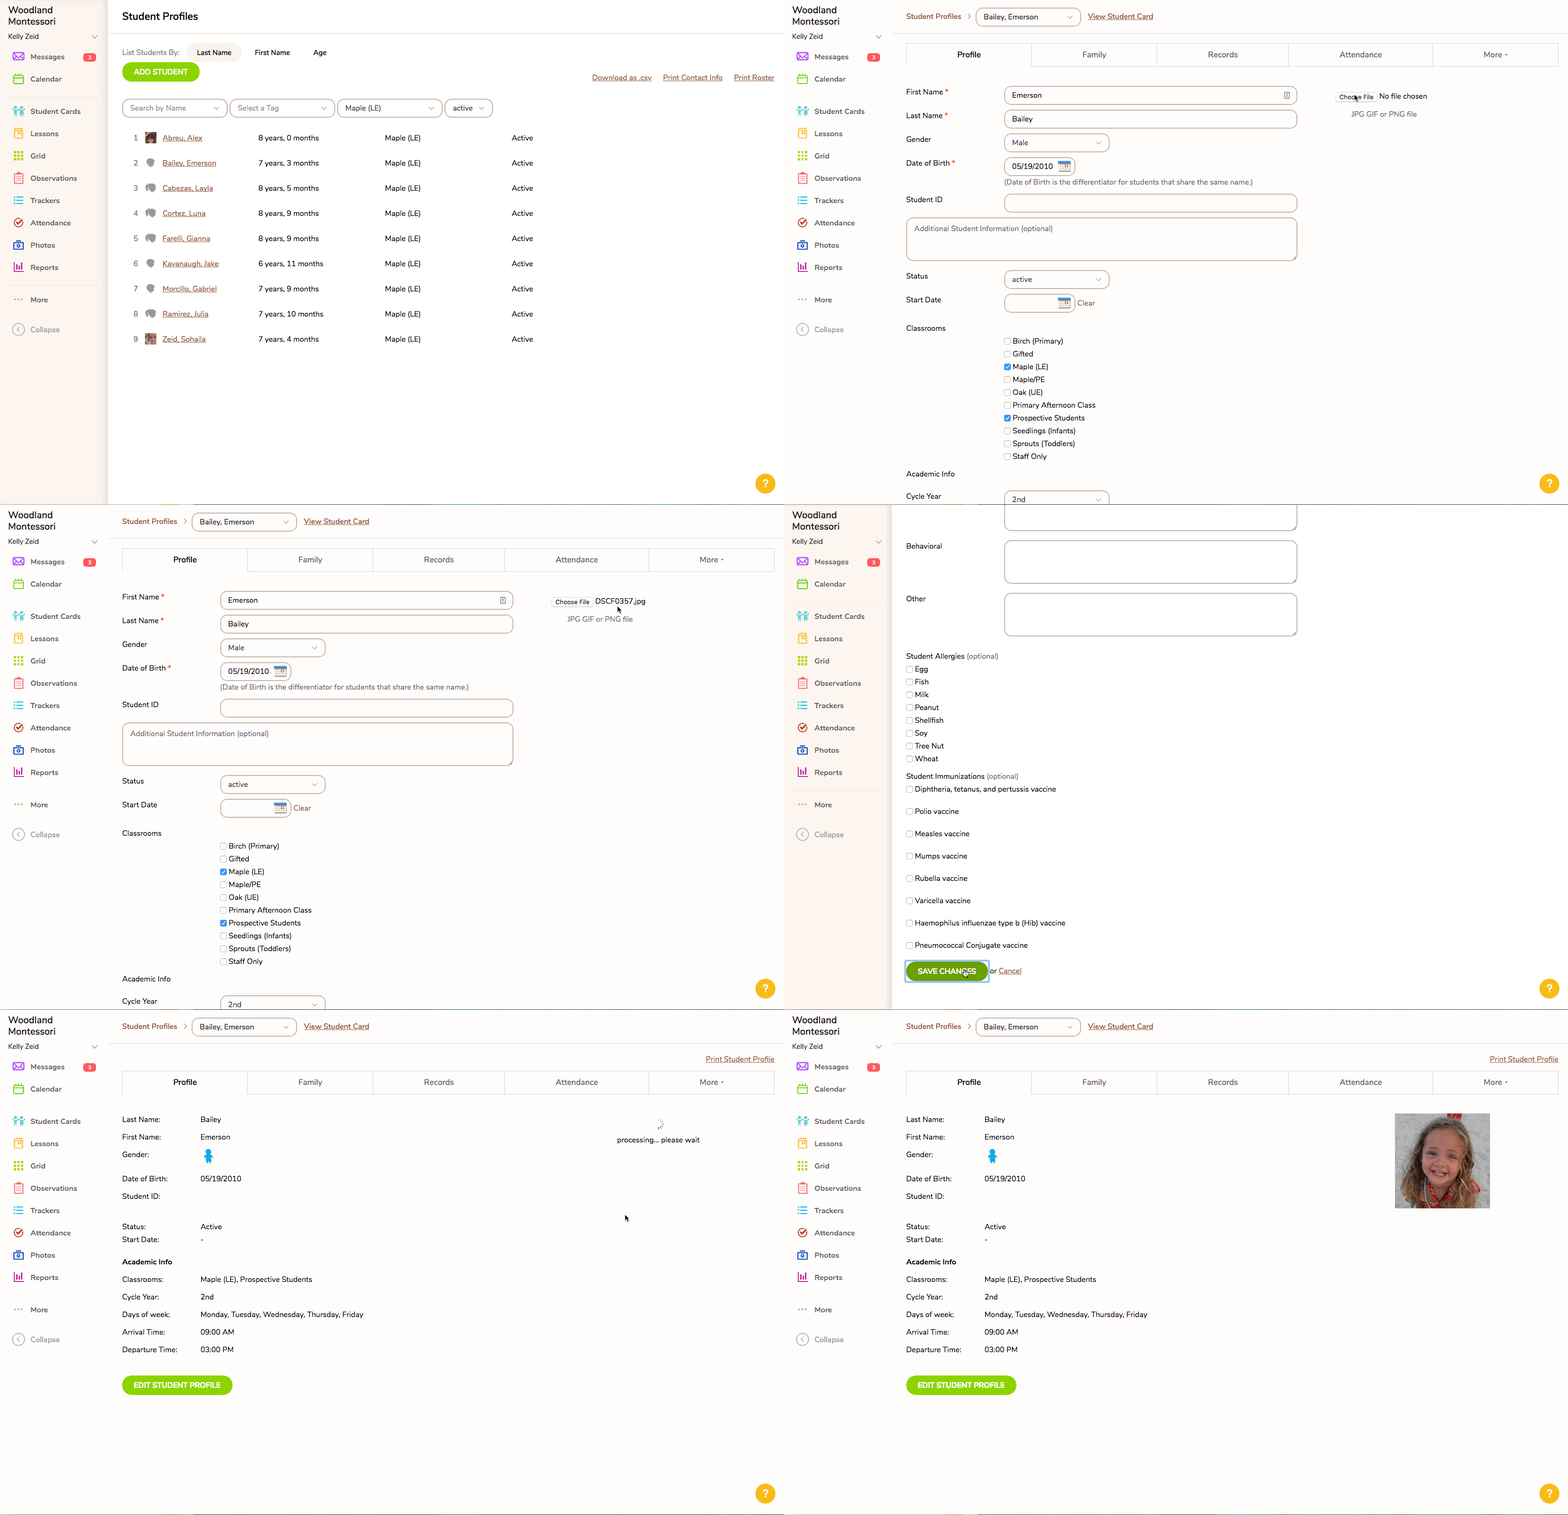
- Go to <More/Student Profiles> and click on a student's name. You'll see a profile silhouette in the upper right corner.
- Click the "Edit Student Profile" button and, where that silhouette was, you'll now see an option to "Choose file." This file must be in one of the following formats (jpg, png, or gif).
- Once you select the photo you want to upload, scroll to the bottom of the profile and click "Save Changes." That will start the upload process, and once complete, you'll see the profile photo appear in that corner.
Note: The photos used for profiles must be uploaded from your computer or other photo storage service. If the photo is within MC, you must first download the image, and then upload it to the profile.

